How Workers’ Comp Clinics Fax DWC PR-2 and RFA Forms Without Rejections

If your clinic’s PR-2 progress reports or RFA treatment requests keep bouncing back, it’s rarely “the fax machine’s fault.” Most rejections trace to avoidable issues: missing identifiers, illegible scans, wrong destination numbers, or mismatched pages. The good news is that you can fix these with a reliable sending workflow, a short pre-fax checklist, and clear QA ownership.
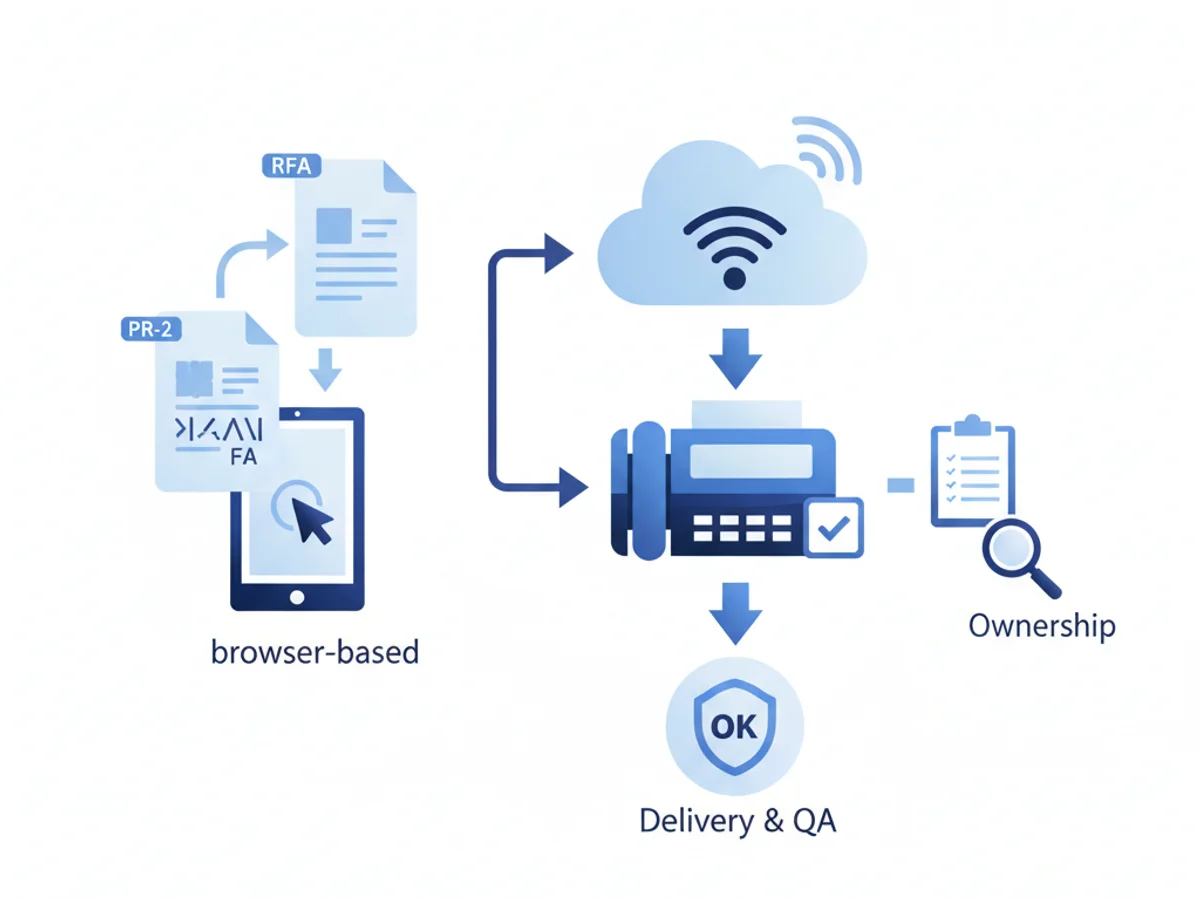
Below is a practical, clinic-tested approach to getting DWC PR-2 and RFA packets accepted on the first try—using browser-based faxing so staff can file from any workstation or mobile device, with delivery receipts you can attach to the chart.
Start with the problem you actually have: preventable rejections
Real clinics see the same patterns:
- The PTP’s name is on page 1, but the NPI or AD case number is missing on page 2, so the receiver detaches it and can’t match it.
- The top of the PR-2 is crisp, but the attached chart notes were photographed, not scanned, and are unreadable after fax compression.
- RFA is dated, but the date of injury (DOI) and claim number are buried on page 6 of a prior PR-2—leading to a “cannot identify patient/claim” rejection.
- Fax was sent to the adjuster’s desk line, not the claims fax, or to UR instead of claims (or vice versa), so it times out or is never indexed.
- A resend is made, but without a clear subject or cross-reference, leading to duplicates that create confusion.
Your goal is not just to “fax it,” but to make a packet that can be indexed quickly by a claims system or UR vendor on the first pass. That means every page needs unmistakable identifiers and clean legibility.
Build a zero-rejection packet: identifiers, order, and legibility
Use this compact checklist before every send. It’s tuned for PR-2 and RFA workflows in California workers’ compensation.
- Put core identifiers on every page
- Required on every page header or footer: Patient name, Date of Birth (DOB), Employer, Claim number, Date of Injury (DOI), Adjuster or Claims Admin, PTP name and NPI, Clinic name and phone.
- For PR-2: Ensure the WCAB or AD case number (if available) is included in the cover page and at least page 1. If the case number is unknown, claim number must be present and consistent.
- For RFA: Include the injured worker’s identifiers plus PTP info and requested CPT/HCPCS or service descriptors on page 1, and mirror those on the cover page.
Practical tip: Stamp or pre-fill a header on all attachments before merging. Many rejections occur on detached pages (e.g., imaging reports) that lose context.
- Lock the document order
- PR-2 sequence: 1) Cover page; 2) PR-2 form; 3) Chart notes supporting medical necessity; 4) Imaging/lab reports; 5) Work status form; 6) Any correspondence.
- RFA sequence: 1) Cover page with “RFA” in the subject; 2) RFA form; 3) Supporting evidence (chart notes, prior auths, UR decisions, guidelines citations); 4) Relevant PR-2 excerpts; 5) Imaging/lab.
- Ensure legible, fax-friendly scans
- Use true PDF output from your EHR whenever possible. If you must scan, choose 200–300 DPI, black-and-white or grayscale for text; avoid photos from phones when possible.
- Remove color-heavy backgrounds that get muddy on fax. Flatten forms (print-to-PDF) to prevent field artifacts.
- Check that signature blocks and date fields are dark enough; light blue ballpoint often vanishes after fax compression.
- Use explicit, minimal cover pages
- Include: Patient, DOB, DOI, Claim #, Adjuster/Claims Admin, PTP/NPI, Sender contact, Total pages, and document type (“PR-2” or “RFA”).
- Add a short “Indexing Notes” line: e.g., “RFA: Left shoulder MRI; include CPT 73221; urgent—surgery scheduled 09/15.” This helps receivers route quickly.
- Confirm the correct destination
- Verify the dedicated fax for the claim administrator or UR vendor. Adjusters’ personal lines or email-to-fax aliases often fail silently.
- For RFAs, confirm if the payer requires direct UR submission versus adjuster fax. Some payers reject RFAs not sent to the UR-designated line.
A browser-based workflow the front desk can actually follow
Here’s a simple, teachable process your MA or front desk can run without installing software. The service works from any modern browser—Safari, Chrome, Firefox, Edge—so staff can send from a workstation or a clinic tablet. There’s no app required.
Step 1: Assemble the packet
- Export PR-2 or RFA as PDF from your EHR.
- Add supporting docs: chart notes, imaging, work status, prior UR decisions. If any are images or Word files, keep them as clean PDFs where possible.
- Merge in final order. Name the file with date and type (e.g., “2026-07-12_RFA_Smith_DOI2025-03-04.pdf”).
Step 2: Apply identifiers to every page
- Use your EHR’s header template or a PDF editor stamp.
- Quick QA: Scroll through the PDF and verify the claim number and patient name repeat on all pages, including attachments.
Step 3: Send from the browser
- Upload PDFs, Word docs, or images. Professional cover pages are available; use them to surface key identifiers and a brief indexing note.
- Enter the validated fax number. If you’re sending to UR, label the subject as “RFA – [Body part/procedure].”
Step 4: Wait for the confirmation/delivery receipt
- Save the receipt to the chart. This becomes your timestamped proof of timely filing.
- If the confirmation indicates a failure (busy, no answer), resend after validating the destination number or try at off-peak hours.
Note on security: Fax transmissions use TLS encryption in transit. The tool does not offer a BAA or formal healthcare compliance certification, so clinics should evaluate whether the service aligns with their compliance policies and state requirements before use.
Pricing snapshot: You can pay per fax at $4.95 (helpful for occasional submissions) or subscribe at $10/month if you send regularly. There is no free trial, so factor that into your budgeting.
PR-2 specifics: common mistakes and fast fixes
PR-2 forms often fail because they’re treated as a narrative letter rather than a structured report.
- Missing evolution of condition: Adjusters expect a concise clinical update tied to work restrictions and next steps. If it reads like a generic SOAP note, it may be delayed or questioned. Attach a one-page summary that highlights the functional change since last PR-2.
- Work status buried in text: Place work status on its own page (or bold in the PR-2) and include it near the front of the packet. Some systems index work status separately.
- No cross-reference to prior recommendations: If the previous RFA was denied pending documentation, cite that UR decision number and show what changed. Include that on the cover page under “Indexing Notes.”
- Illegible signatures/dates: If the PTP signature is faint, rescan at higher contrast. Check that the PTP NPI and license are readable.
- Attachments without patient identifiers: Stamp all imaging and external consult notes before merging.
Before sending a PR-2, do a 60-second audit:
- Page 1 shows Patient, DOB, DOI, Claim #, PTP/NPI, clinic contacts.
- Work status easily visible within first two pages.
- Each page includes patient + claim number.
- Attachment order supports your assessment and plan (notes before imaging, not the other way around).
- Cover page mentions PR-2 date and any pending utilization review context.
RFA essentials: make it review-ready for UR
The RFA is time-sensitive and documentation-heavy. A clean, concise RFA packet reduces back-and-forth and denials.
- Be explicit on the request: List CPT/HCPCS codes when known, side/level (e.g., L4–L5), frequency/duration (e.g., PT 2x/week x 6 weeks), and clinical rationale tied to guidelines.
- Reference guidelines: If citing MTUS/ACOEM or ODG, quote the relevant criteria and circle or highlight where your patient meets them in the notes. Put this summary right after the RFA form.
- Include failed conservative care timeline: UR reviewers look for documented trials and responses. A one-paragraph timeline often prevents “insufficient documentation” denials.
- Attach relevant diagnostics: Only what supports the request. Too many pages can obscure key evidence. Place the most relevant imaging immediately after the rationale page.
- Keep contact details obvious: Dedicated callback line for peer-to-peer, PTP availability windows, and a direct fax back number if available.
RFA 90-second pre-flight check:
- Page 1 clearly states “RFA” with requested service, side/level, and urgency.
- CPT codes (if applicable) and frequency/duration spelled out.
- Clinical rationale page referencing guidelines placed right after the form.
- Diagnostics and progress notes limited to what supports the request, all pages stamped with patient + claim number.
- Destination fax is the payer’s designated UR line.
Handling rejections and resends without losing time
Even with a tight workflow, occasional failures happen: line busy, wrong queue, or automated rejections.
- Use your delivery receipt: If it shows “failed,” double-check the fax number against the payer’s portal or the adjuster’s email signature. If it shows “delivered,” but the payer says they didn’t receive it, include the receipt in your follow-up email and resend to a secondary number if available.
- Adjust the send window: Some carriers throttle during midday. Early mornings or late afternoons can improve throughput for large packets.
- Split oversized packets: If your combined file is very large, break it into two faxes: “RFA Part 1—Form and Rationale” and “RFA Part 2—Diagnostics.” Cross-reference on each cover page.
- Keep a resend log: Track date/time, destination, and confirmation ID in the chart. That protects timely filing and shows a good-faith effort.
Setting up a small but effective clinic protocol
You don’t need a complex system—just consistent steps, clear roles, and proof of delivery.
- Role clarity: Front desk assembles and stamps; MA validates identifiers and order; PTP signs; front desk sends and files the confirmation receipt.
- Standard cover page templates: One for PR-2, one for RFA, with the indexing notes field.
- Destination directory: Maintain a living list of payers, adjusters, and UR vendors with correct fax numbers. Update it after every bounce.
- QA spot checks: Once a week, sample two PR-2s and one RFA for page identifiers, legibility, and receipt filing.
Where browser-based faxing fits (and what to know up front)
A web-based tool can streamline this without extra software or device installs. Staff can upload PDFs, Word files, or images from any browser session, use professional cover pages, and get confirmation receipts to store in the chart. Pricing is straightforward: $4.95 per fax or $10/month subscription. There’s no free trial.
Security note: Fax transmissions use TLS encryption. The service does not provide a Business Associate Agreement (BAA) or formal healthcare compliance certification. Many clinics still use it for administrative workers’ comp documents, but you should evaluate your compliance posture, document types, and payer expectations before adopting it for PHI-intensive workflows.
Practical sending tip: After you click send, wait for the delivery receipt and save it immediately to the EHR under “PR-2” or “RFA” with the send date in the filename. If you’re contesting a timeliness dispute, that receipt is your best friend.
Example: Turning a 30% rejection rate into clean first-pass approvals
A three-provider occupational medicine clinic struggled with frequent RFA “not received” disputes and PR-2 indexing delays. They adopted the workflow above:
- Implemented a stamped header with patient + claim + DOI auto-applied to all pages.
- Moved guideline rationale to page 2 of RFAs, followed by only the most relevant imaging.
- Built a payer/UR fax directory and validated numbers at each visit.
- Shifted sending to early mornings and saved all confirmation receipts in the chart.
In 60 days, resends dropped by 70%, and UR turnaround improved because the packets were easier to index and review. Staff time freed up because fewer “status check” calls were needed.
Final takeaways
- Every page needs unmistakable identifiers—especially attachments.
- Keep packets lean, ordered, and fax-friendly. Put rationale up front for RFAs.
- Verify destination numbers and save your delivery receipts to the chart.
- A simple browser-based tool with cover pages, file uploads, and confirmation receipts can support a reliable, teachable workflow.
Send your first fax at BestFax.com
Related Posts

How ASCs Can Fax Operative Reports to Referring Doctors Without Follow-Up Delays
Practical steps ASCs can use to fax operative reports to referring doctors quickly, accurately, and with fewer follow-up delays.

How Mobile Phlebotomists Fax Lab Requisitions Without Specimen Delays
Practical field tips for mobile phlebotomists to fax lab requisitions clearly, confirm delivery, and avoid paperwork-related specimen delays.

How Title Companies Fax Payoff Statements Without Closing Delays
Payoff statements can stall closings when faxing is slow or disorganized. Learn practical steps title companies can use to send, confirm, and track payoff faxes.