Zero-Return Faxes: A Midwife’s Guide to Sending Birth Certificate Worksheets Without Rejections
When a baby arrives at 2:17 a.m., you don’t want your paperwork bouncing back at 3:04. Yet many midwives see vital records reject birth certificate worksheets for small, preventable issues: unreadable pages, missing signatures, or the wrong fax line. This guide shows exactly how to prepare, check, and transmit worksheets so they’re accepted the first time—using browser-based faxing you can access from your phone, tablet, or computer.
Start with the real cause of rejections (and fix it upstream)
Rejections rarely come from the fax machine on the other end “not working.” They come from:
- Data mismatches: Parent names or dates differ between the worksheet and ID copies.
- Missing or stale consent: Parent signature missing or date outside the jurisdiction’s allowed window.
- Illegible scans: Shadowed corners, low-resolution photos, or cut-off margins.
- Wrong destination: Faxing to a hospital admissions line instead of the Vital Records unit.
- Timing: Sending after office hours to a line that prints to a shared machine, then pages get misfiled.
Work backward from these failure points:
- Audit your packet: Know exactly what your local Vital Records office requires. Some expect the worksheet plus a copy of the parent’s ID, a cover sheet with facility ID, and a signed attestation. Keep a one-page “packet checklist” clipped to every chart.
- Create a white-glove intake: Before you ever reach for fax, confirm spellings, hyphenations, diacritics, and birth date/time formats against IDs. Have a scripted read-back: “I have Baby’s time as 02:17, 24-hour format, on 04/11/2026—yes?”
- Lock your template: Use a single, version-controlled worksheet template with fixed margins and an embedded signature field. Avoid printing from a shrunken preview window; export to PDF at 100%.
Prepare a fax packet Vital Records actually wants
Think of your fax as a single, coherent packet that a clerk can process without hunting for missing pieces.
Recommended packet order:
- Cover page (facility name, sender name, secure callback number, number of pages, baby’s last name, DOB/time in 24h, mother’s last name at birth, and your internal case number). Use a professional, standardized cover page every time—this tool provides one.
- Birth certificate worksheet (complete, typed if possible; handwritten fields must be dark ink and block letters).
- Required supporting documents (e.g., parental IDs if permitted/required by your jurisdiction; paternity acknowledgment if applicable; any state-mandated attestations).
- Optional final page: A short “routing note” with the direct return-fax number and your after-hours phone if corrections are needed the same day.
Formatting tips that prevent legibility rejections:
- Export to PDF from your EHR or word processor. If you must scan, use 300 dpi grayscale, straightened, with 0.25-inch margins visible on all sides.
- Disable “fit to page” when printing and rescanning; it can shrink forms and cut checkboxes.
- For smartphone captures, use a flat, well-lit surface. Avoid angled photos; use a scan app that flattens perspective and crops edges.
- Dark signatures only. Ballpoint signatures in faint ink often disappear in fax compression.
- Use standard US Letter (8.5"x11"). State forms rarely like legal size unless specified.
Transmit from anywhere—safely and traceably
You can send and receive faxes from any modern browser—phone, tablet, or computer—without installing an app. Upload PDFs, Word docs, or image files, stack them in order, add the cover page, and enter the destination fax number. TLS encryption is applied to the transmission path. Delivery confirmation receipts help you document compliance and timing.
Honest note on privacy: The service does not provide a BAA and doesn’t claim HIPAA certification. Many midwives still use browser-based faxing for birth registrations because state vital records offices rely on fax infrastructure and the content is encrypted in transit. If your regulatory context or practice policies require a signed BAA, verify your options before adopting any tool.
Pricing reality check: You can pay $4.95 one-time per fax or choose a $10/month subscription if you send regularly. There is no free trial, so plan your adoption by testing with a non-PHI mock packet or redacted sample.
The no-reject workflow: a 15-minute checklist you can trust
Use this end-to-end flow after every birth. It’s tight enough for a 3 a.m. submission and robust enough for state audits.
- Verify identities and spellings
- Compare parent names on the worksheet to their IDs letter-by-letter, including hyphens and apostrophes.
- Confirm mother’s last name at birth exactly as the state form expects (maiden vs. current surname varies by jurisdiction).
- For dual last names or diacritics, follow the state’s guidance on characters permitted in the registration system. If accents are not supported, convert consistently.
- Confirm critical event details
- Time of birth: Use 24-hour format, leading zero included (e.g., 02:17). Cross-check with clinical notes.
- Place of birth: Enter Out-of-Hospital/Home or Birth Center with correct facility or practice ID.
- Attendant details: Your license number and title exactly as on file with the state.
- Check signatures and dates
- Parent signatures dated the day you finalize the worksheet—or within the state’s required time window.
- Your signature (electronic or wet) on the attestation page, if required.
- Assemble your packet in the correct order
- Use the professional cover page and add: total pages, sender name/callback, baby last name, DOB/time, and the receiving department name (e.g., “Vital Records—Birth Registration Unit”).
- Attach the worksheet and supporting documents.
- Optimize legibility
- Export as a single PDF where possible. If combining, check page order in your preview.
- For scans/photos, confirm every field is readable at 100% zoom.
- Confirm destination and timing
- Verify the exact Vital Records fax number from the state/county website or the latest memo—don’t rely on an old sticky note.
- Note hours: Some offices batch-print and file morning-only. Faxing during their intake window reduces misroutes.
- Send via browser-based faxing
- Log in from any browser (Safari, Chrome, Firefox, Edge). No app required.
- Upload PDF, Word, or image files. Add the cover page, type the destination number, and send.
- Save the confirmation/delivery receipt to the chart or EHR. If a page fails, resend the affected page(s) as a clean, clarified copy.
- Post-send follow-up
- If your state offers same-day indexing, place a reminder to confirm receipt before close of business.
- If no confirmation from the office by the next day, call with your fax confirmation ID handy. Vital Records clerks love a clear reference number.
What to do when Vital Records calls back: fast fixes that stick
Even airtight packets sometimes need a tweak. Here’s how to recover without a formal rejection.
Scenario 1: “The mother’s surname doesn’t match the ID by one character.”
- Action: Fax a corrected worksheet page with a bright “Corrected Copy” header and the same case reference number. Include a tiny note on the cover: “Surname corrected from ‘Jonson’ to ‘Johnson’ per DL.”
Scenario 2: “Signature is faint or cropped.”
- Action: Obtain a fresh dark-ink signature on the specific page. Re-scan at 300 dpi, verify margins, and resend only the corrected page plus the cover page referencing the original submission date/time.
Scenario 3: “We never received page 3.”
- Action: Don’t resend the entire packet unless requested. Send page 3 with the cover page noting ‘Partial resend—page 3 of 6 from 04/11/2026 09:12.
Scenario 4: “Wrong fax line; please use our Birth Registration Unit number.”
- Action: Update your internal contact sheet immediately. In your follow-up fax, state “Resubmission to correct line; duplicate suppression requested.” This reduces duplicate indexing downstream.
Scenario 5: “Unreadable time of birth.”
- Action: Type the time into a text field rather than relying on handwriting. If you maintain a form with both typed and signed areas, use typed entries for all numeric fields.
Build a resilient, audit-friendly process in your practice
Good process turns frantic nights into manageable mornings.
- Maintain a “Vital Records Packet” drawer (physical or digital): current worksheet template, cover page template, routing guide with confirmed fax numbers, and a quick reference of state formatting rules (time, characters, required fields).
- Version control: Date-stamp templates. Archive superseded forms so no one grabs an old version.
- Training cadence: New staff practice building a mock packet and sending it using the browser-based tool from both desktop and phone.
- Incident log: If a packet is delayed or corrected, log the reason and the fix. Review monthly to eliminate repeat issues.
- Two-minute pre-flight: Before sending, someone other than the preparer glances at names, time of birth, page count, and destination number. Most rejections die here.
Why midwives prefer browser-based faxing for this task
- Accessibility: You can send from any browser—on-call midwives can transmit from the client’s home, the birth center, or their car (parked) right after scanning or exporting the PDF.
- No app download required: Reduces IT friction on shared clinic devices.
- Document fidelity: PDFs, Word files, and clear images move cleanly through fax compression when prepared at proper resolution.
- Professional cover pages included: Standardized headers make clerks’ lives easier and reduce misfiles.
- Receipts matter: Delivery confirmations give you a clear timestamp to satisfy state deadlines and audit trails.
- Straightforward pricing: Choose per-fax ($4.95) for occasional use or $10/month if you send frequently.
- Security in transit: TLS encryption is applied to transmissions, though you should note there’s no BAA or formal HIPAA certification.
Two real-world examples from midwifery teams
Example A: Homebirth practice in a rural county
- Challenge: Poor cell service; hospital fax line occasionally misroutes to admitting.
- Approach: The midwife saves the packet as a single PDF while still at the client’s home, then submits via browser-based faxing once back at the clinic Wi-Fi. They keep a laminated card with the county’s direct Vital Records fax number and office hours.
- Result: Delivery confirmations in the chart; rejections dropped to near zero after they standardized 24-hour time and margin checks.
Example B: Birth center with rotating staff
- Challenge: Staff used different worksheet versions; mismatched fields triggered callbacks.
- Approach: They locked a master template, created a two-minute pre-flight, and trained everyone to send from their desktops or tablets using the same cover page language and field formats.
- Result: Same-day indexing improved; corrections became rare and easy to trace thanks to consistent cover notes and confirmation IDs.
Quick reference: your zero-reject packet recipe
- One cover page with clear identifiers and a direct callback number.
- Worksheet completed with typed fields where possible; legible, dark signatures.
- Supporting IDs/attestations per state rules, 300 dpi, full margins.
- Verified destination fax number and timing.
- Single-PDF packet preferred; page order double-checked.
- Send via browser-based faxing; save the delivery receipt to the chart.
- If contacted, correct only the affected page(s) with a concise cover note.
A few minutes of standardization pays for itself in fewer callbacks, happier clerks, and timely registrations for the families you serve.
Send your first fax at BestFax.com.
Related Posts
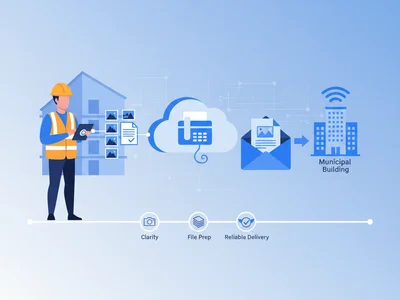
How Municipal Building Inspectors Fax Correction Notices with Photo Evidence
A practical, field-ready guide for inspectors to fax correction notices with photo evidence from any browser, with tips on clarity, file prep, and reliable delivery.
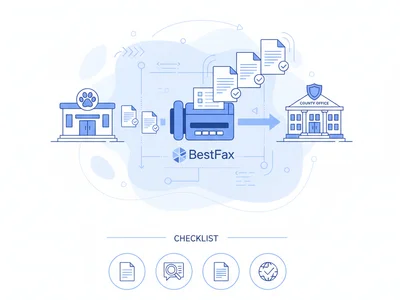
How Veterinary Clinics Fax Rabies Certificates to County Offices Without Rejections
Stop rabies certificate rejections. Use this clinic-ready checklist for clean PDFs, correct data, proper cover pages, and verifiable fax delivery to county offices.
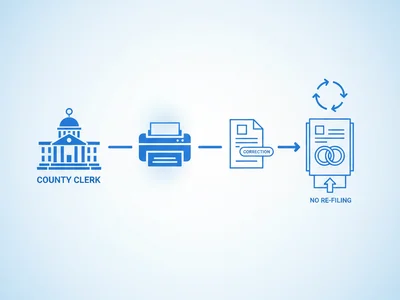
How County Clerks Fax Marriage License Corrections Without Forcing Couples to Re‑File
Clerks can fix minor marriage license errors fast by faxing targeted corrections—no re-filing. Use this step-by-step workflow, templates, and pitfalls to avoid delays.